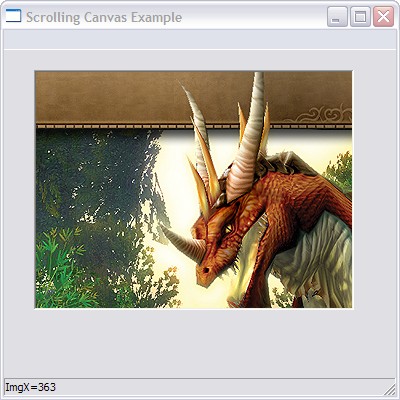
| SuperStrict Local Pix:TPixmap=LoadPixmap("D:\My Documents on E\_Tutorials\dragon-800x.jpg") Local MyWindow:TGadget=CreateWindow("Scrolling Canvas Example", 100, 10, 400,400) Local MyPanel:TGadget=CreatePanel(30, 20, 320, 240, MyWindow, PANEL_ACTIVE|PANEL_BORDER) Local MyCanvas:TGadget=CreateCanvas(0, 0, 800,600, MyPanel) SetGraphics CanvasGraphics(MyCanvas) DrawPixmap Pix,0,0 Local ImgX:Int=0 Local ImgY:Int=0 Local Timer:TTimer=CreateTimer(60) Repeat WaitEvent() Select EventID() Case EVENT_WINDOWCLOSE End Case EVENT_TIMERTICK imgX=imgX+1 If ImgX>=GadgetWidth(MyCanvas) Then ImgX=0 RedrawGadget(MyCanvas) Case EVENT_GADGETPAINT SetGraphics CanvasGraphics (MyCanvas) SetGadgetShape MyCanvas,-ImgX, -ImgY,GadgetWidth(MyCanvas),GadgetHeight(MyCanvas) Flip End Select SetStatusText MyWindow, "ImgX="+ImgX Forever |
|
| Local
Pix:TPixmap=LoadPixmap("D:\My Documents on E\_Tutorials\dragon-800x.jpg") |
| Local
MyWindow:TGadget=CreateWindow("Scrolling Canvas Example",
100, 10, 400,400) Local MyPanel:TGadget=CreatePanel(30, 20, 320, 240, MyWindow, PANEL_ACTIVE|PANEL_BORDER) Local MyCanvas:TGadget=CreateCanvas(0, 0, 800, 600, MyPanel) |
| SetGraphics CanvasGraphics(MyCanvas) DrawPixmap Pix,0,0 |
| Local ImgX:Int=0 Local ImgY:Int=0 Local Timer:TTimer=CreateTimer(60) |
| Case EVENT_TIMERTICK imgX=imgX+1 If ImgX>=GadgetWidth(MyCanvas) Then ImgX=0 RedrawGadget(MyCanvas) |
| Case EVENT_GADGETPAINT SetGraphics CanvasGraphics (MyCanvas) SetGadgetShape MyCanvas,-ImgX, -ImgY,GadgetWidth(MyCanvas),GadgetHeight(MyCanvas) Flip End Select |
| Function SetGadgetShape( gadget:TGadget,x,y,w,h ) |
| SuperStrict Local Pix:TPixmap=LoadPixmap("D:\My Documents on E\_Tutorials\dragon-800x.jpg") Local MyWindow:TGadget=CreateWindow("Scrolling Canvas Example", 100, 10, 400,400) Local MyPanel:TGadget=CreatePanel(30, 20, 320, 240, MyWindow, PANEL_ACTIVE|PANEL_BORDER) Local CanvasHeight:int=600 Local CanvasWidth:int=800 Local MyCanvas:TGadget=CreateCanvas(0, 0, CanvasWidth, CanvasHeight, MyPanel) SetGraphics CanvasGraphics(MyCanvas) DrawPixmap Pix,0,0 Local ImgX:Int=0 Local ImgY:Int=0 Local VScroller:TGadget=CreateSlider(GadgetWidth(MyPanel)+30, 20, 20, GadgetHeight(MyPanel), MyWindow, SLIDER_VERTICAL) Local HScroller:TGadget=CreateSlider(30,GadgetHeight(MyPanel)+20, GadgetWidth(MyPanel), 20, MyWindow, SLIDER_HORIZONTAL) SetSliderRange VScroller, GadgetHeight(MyPanel), CanvasHeight SetSliderRange HScroller, GadgetWidth(MyPanel), CanvasWidth Repeat WaitEvent() Select EventID() Case EVENT_WINDOWCLOSE End Case EVENT_GADGETACTION Select EventSource() Case HScroller ImgX=EventData() Case VScroller ImgY=EventData() End Select RedrawGadget(MyCanvas) Case EVENT_GADGETPAINT SetGraphics CanvasGraphics (MyCanvas) SetGadgetShape MyCanvas,-ImgX, -ImgY,GadgetWidth(MyCanvas),GadgetHeight(MyCanvas) Flip End Select SetStatusText MyWindow, "ImgX="+ImgX+", ImgY="+ImgY Forever |
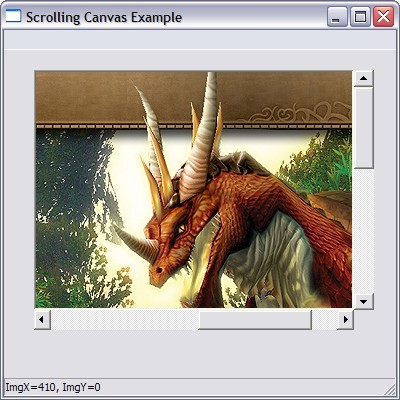 |
| Local VScroller:TGadget=CreateSlider(GadgetWidth(MyPanel)+30, 20, 20, GadgetHeight(MyPanel), MyWindow, SLIDER_VERTICAL) Local HScroller:TGadget=CreateSlider(30,GadgetHeight(MyPanel)+20, GadgetWidth(MyPanel), 20, MyWindow, SLIDER_HORIZONTAL) |
| SetSliderRange VScroller, GadgetHeight(MyPanel), CanvasHeight SetSliderRange HScroller, GadgetWidth(MyPanel), CanvasWidth |
| Function SetSliderRange(slider:TGadget,range0,range1) |
| Function SetSliderRange(slider:TGadget,Visible Range,Total Range) |
| Case EVENT_GADGETACTION Select EventSource() Case HScroller ImgX=EventData() Case VScroller ImgY=EventData() End Select RedrawGadget(MyCanvas) |
| Case EVENT_GADGETPAINT SetGraphics CanvasGraphics (MyCanvas) SetGadgetShape MyCanvas,-ImgX, -ImgY,GadgetWidth(MyCanvas),GadgetHeight(MyCanvas) Flip End Select |